Numpy, Arrays, and Images#
Numpy is used extensively in the Python world. It is the foundation of virtually all of the numerical computing projects that are implemented in the Python language. It has a long history within the Python community, and like Charts, Plots, and Matplotlib, numpy’s contributions to the scientific community cannot be overstated. Py5 is well positioned to be used for numerical computing because of its close ties with numpy.
Numpy is one of py5’s dependencies, so it will always be installed alongside py5.
Comparing pixels & np_pixels#
In Processing and p5, direct pixel manipulation is done
with pixels, a one dimensional array of colors (integers).
Using this array can be a bit tedious because we usually think about
the Sketch window in two dimensions, not one. For example, to
change a pixel at a specific location in the Sketch window,
we must do a few calculations to find that pixel’s location
in the one dimensional array.
You can accomplish many things working with a one dimensional array of pixels. However, working with pixels in this way is also very different from how direct pixel manipulation is typically done by virtually every Python program that has access to numpy.
In the Python world, direct pixel manipulation is typically done with a 3 dimensional array. The 3 dimensions represent the vertical and horizontal positioning of the pixel and the pixel’s color, split into several color channels.
To provide analogous functionality, py5 offers the 3
dimensional array np_pixels. This is actualized in
np_pixels[], Py5Graphics.np_pixels[],
and Py5Image.np_pixels[].
Let’s explore these two pixel data structures with a simple example. We will start with our imports.
from itertools import product

import cv2
import numpy as np
from PIL import Image

import py5_tools
import py5
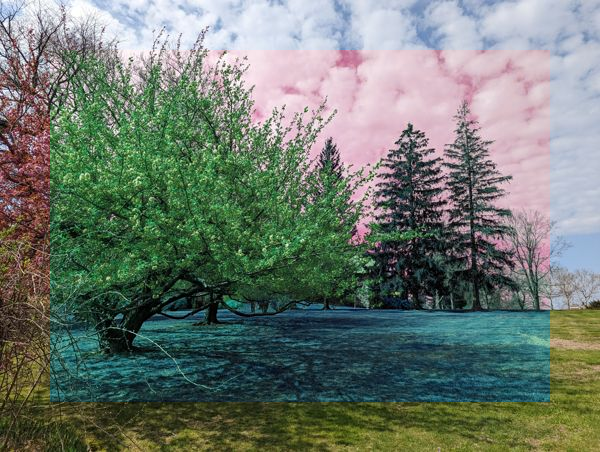
Our example will first load an image and draw it to the screen. Then we will swap the color channels for all of the pixels contained within an inner region of the Sketch window. For each modified pixel, we will rotate the color channels so that Blue becomes Red, Red becomes Green, and Green becomes Blue.
To do this we must loop through all of the pixels in pixels[] and extract each pixel’s Red, Green, and Blue values. Then we will re-order the Red, Green, and Blue values to create a new color. This new color will be assigned back to pixels[].
def setup():
    py5.size(600, 452)

    img = py5.load_image('images/trees.jpg')
    py5.background(img)

    py5.load_pixels()

    for x, y in product(range(50, py5.width - 50), range(50, py5.height - 50)):
        color = py5.pixels[y * py5.width + x]
        red = py5.red(color)
        green = py5.green(color)
        blue = py5.blue(color)
        new_color = py5.color(blue, red, green)

        py5.pixels[y * py5.width + x] = new_color

    py5.update_pixels()


py5.run_sketch()
In the Sketch code, observe the calls to load_pixels() and update_pixels(). These are necessary to prepare pixels[] for accessing color information and to write changes to pixels[] back to the Sketch window.
Also observe the y * py5.width + x code used to find each pixel in the
pixels[] array. If that calculation was incorrect, the
Sketch would behave erratically or crash.
If you are running this code yourself, you will also notice the Sketch is very slow. It takes at least a few seconds for it to complete the pixel alterations. It does finish eventually, and has a nice result:
py5_tools.screenshot()
Now let’s do this again, but with np_pixels[].
In the following code, the for loop is gone, and load_pixels() and
update_pixels() have been replaced with
load_np_pixels() and update_np_pixels().
def setup():
    py5.size(600, 452)

    img = py5.load_image('images/trees.jpg')
    py5.background(img)

    py5.load_np_pixels()

    # extract individual channels
    alpha_channel = py5.np_pixels[50:-50, 50:-50, 0].copy()
    red_channel = py5.np_pixels[50:-50, 50:-50, 1].copy()
    green_channel = py5.np_pixels[50:-50, 50:-50, 2].copy()
    blue_channel = py5.np_pixels[50:-50, 50:-50, 3].copy()

    # assign red channel to green
    py5.np_pixels[50:-50, 50:-50, 2] = red_channel

    # assign green channel to blue
    py5.np_pixels[50:-50, 50:-50, 3] = green_channel

    # assign blue channel to red
    py5.np_pixels[50:-50, 50:-50, 1] = blue_channel

    py5.update_np_pixels()

py5.run_sketch()
Observe how our code is extracting each of the individual color channels.
    # extract individual channels
    alpha_channel = py5.np_pixels[50:-50, 50:-50, 0].copy()
    red_channel = py5.np_pixels[50:-50, 50:-50, 1].copy()
    green_channel = py5.np_pixels[50:-50, 50:-50, 2].copy()
    blue_channel = py5.np_pixels[50:-50, 50:-50, 3].copy()
We are indexing into np_pixels[] to extract entire blocks of data. The last index value in each line of code, 0, 1, 2, and 3, correspond to the Alpha, Red, Green, and Blue channels, in that order.
Those blocks of numbers are then assigned back to np_pixels[] to swap the color channels.
This approach yields the same result, but is considerably faster.
py5_tools.screenshot()
Before moving on to the next section, take a moment to ponder the effects of swapping color channels. The image retains the same basic structure, but the colors look odd. From looking at an image, do you think you’d be able to tell that the color channels have been moved around?
Color Channel Ordering#
The np_pixels array’s third dimension can sometimes be tricky
to work with because you must be cognizant of where each color
channel is located in the Color Channel Ordering. Sometimes the term
“bands”
will be used.
The core issue you need to pay attention to is the fact that there is no standard or “correct” way to order the Color Channel. One library might order the Color Channel starting with Alpha, then Red, Green, and finally Blue (like py5 does), but another might use the order Red, Green, Blue, and then Alpha. Most libraries will offer a way to re-order the Color Channels, of course, but to do that successfully, you need to know what order you are starting with and what order you should re-order it to.
Bottom line, if your code expects the Color Channel Order to be one way but the image data is actually ordered a different way, the image’s colors will be incorrect.
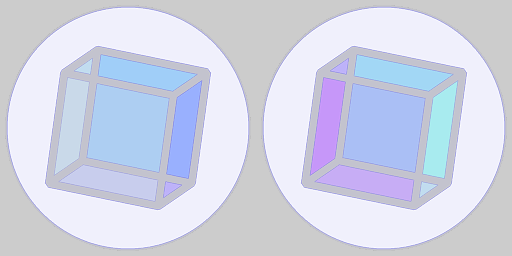
It is best to illustrate what this means for you, the py5 coder, with a brief example. We will explore this by loading an image of the py5 logo and using it to understand Color Channel Ordering.
To begin, we will load the image with the PIL, the Python Imaging Library.
logo_img_pil = Image.open('images/logo.png')

logo_img_pil
Nice looking logo. :) To explore Color Channels, we will convert the image to a numpy array.
logo_array_pil = np.asarray(logo_img_pil)

logo_array_pil.shape
(256, 256, 4)
The last value is 4, indicating this array has 4 Color Channels.
Next we will load the same image using OpenCV. OpenCV loads
images as numpy arrays. We must use the cv2.IMREAD_UNCHANGED
flag to instruct it to retain the image’s alpha channel.
logo_array_opencv = cv2.imread('images/logo.png', cv2.IMREAD_UNCHANGED)

logo_array_opencv.shape
(256, 256, 4)
Now we will use both arrays in a Sketch. We will use the create_image_from_numpy() method to create a Py5Image object from each array.
def setup():
    py5.size(512, 256)
    py5.background(204)

    img_pil = py5.create_image_from_numpy(logo_array_pil)
    img_opencv = py5.create_image_from_numpy(logo_array_opencv)

    py5.image(img_pil, 0, 0)
    py5.image(img_opencv, 256, 0)


py5.run_sketch()
Here is the result:
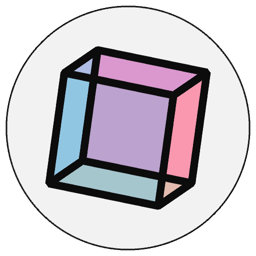
py5_tools.screenshot()
The results are completely wrong. None of the colors look right. The two images don’t look the same as each other, and neither looks like the actual py5 logo:
logo_img_pil
What went wrong?
The answer has to do with Color Channel Ordering.
We know from the previous section that in py5, the Color Channel Order of np_pixels[] starts with Alpha, followed by Red, Green, and finally, Blue (also abbreviated as ARGB).
And here’s the problem: our PIL and OpenCV image arrays use different Color Channel Orderings.
What Color Channel Order do they use? Well, for the PIL Image object,
we can use the mode property to find out:
logo_img_pil.mode
'RGBA'
It is ‘RGBA’, not ‘ARGB’. The Alpha channel is last, not first.
It’s different from what py5 and the create_image_from_numpy() method expect.
Before we continue, let’s think about why this matters.
A numpy array is essentially a multi-dimensional grid of numbers. Each dimension of the grid of numbers means something different. We know that for image data, the first dimension corresponds to height, the second to width, and third to the color channel.
When py5 receives a numpy array and converts it into an image, it must make a decision and interpret the array’s last dimension as a specific sequence of colors. If it uses the wrong sequence colors, it will make mistakes, interpreting the colors incorrectly.
In this case, the create_image_from_numpy() method was interpreting the Color Channel Order as ‘ARGB’, which it will do by default, but the Color Channel Order in the array was actually ‘RGBA’. That means that the image’s first color channel was actually Red, but py5 interpreted it as the Alpha channel. The image’s second color channel, Green, was interpreted by py5 as the Red channel. The image’s third color channel, Blue, was interpreted by py5 as the Green channel. And finally, the image’s last color channel, Alpha, was interpreted by py5 as the Blue channel. Every Color Channel was interpreted incorrectly.
How do we fix it? Well, one way is to manipulate the PIL Image object to re-order the color channels so that when it is converted to a numpy array, the color channel is ordered as py5 expects. That would actually work, but we want a solution that involves py5. In this case, we will pass an extra parameter to the create_image_from_numpy() method to instruct it to interpret the Color Channel Ordering with a different order (‘RGBA’).
def setup():
    py5.size(512, 256)
    py5.background(204)

    img_pil = py5.create_image_from_numpy(logo_array_pil, 'RGBA')
    img_opencv = py5.create_image_from_numpy(logo_array_opencv, 'RGBA')

    py5.image(img_pil, 0, 0)
    py5.image(img_opencv, 256, 0)


py5.run_sketch()
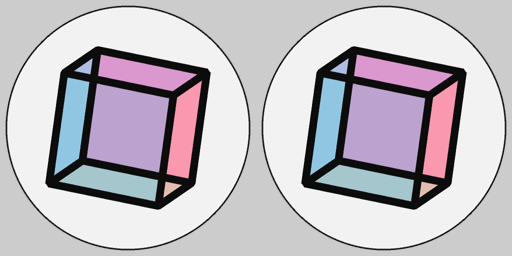
How does it look now?
py5_tools.screenshot()
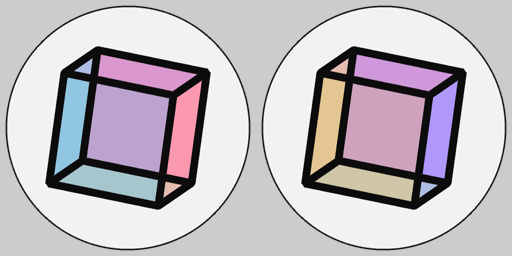
It looks better. The logo image on the left is correct. The black color in the logo image on the right is correct, but the rest are incorrect. We must still be using the wrong Color Channel Order for the image loaded by OpenCV.
If we search around online we will discover that OpenCV reverses the Color Channel Order, ordering it ‘BGR’, or ‘BGRA’ for images with alpha channels.
Let us try our Sketch again, this time using the Color Channel Order ‘BGRA’ for the OpenCV array.
def setup():
    py5.size(512, 256)
    py5.background(204)

    img_pil = py5.create_image_from_numpy(logo_array_pil, 'RGBA')
    img_opencv = py5.create_image_from_numpy(logo_array_opencv, 'BGRA')

    py5.image(img_pil, 0, 0)
    py5.image(img_opencv, 256, 0)


py5.run_sketch()
Now both logo images are drawn correctly.
py5_tools.screenshot()
For the first two examples exploring Color Channel Ordering, py5 was interpreting the array’s Color Channel Ordering incorrectly. There were no exceptions or obvious errors other than the fact that the colors looked wrong to us.
Keep in mind that if we were unfamiliar with what the py5 logo actually looks like, we might not have spotted the mistake at all. This suggests a useful best practice for writing code with image arrays: always test out your code with a familiar image. It will help you spot errors that might otherwise be overlooked.
Bulk Coordinate Methods#
If you are using py5 and need to create a shape with
thousands of vertices, one approach for implementing this
would involve a for loop that creates each vertex,
one at a time.
Unfortunately, that py5 code would execute slowly.
It would execute slowly because the method call for each individual vertex would involve a separate call to py5’s underlying Processing code.
A better approach would involve omitting the for
loop and creating all of the vertices with a single
command. This approach lets py5 create the vertices
in the most efficient way possible. The performance
difference between the two approaches can be significant.
Let’s explore this difference with a simple example
that draws a spiral using a for loop.
INNER_RADIUS = 5
OUTER_RADIUS = 225
ROTATION_COUNT = 20
STEPS_PER_ROTATION = 500
STEPS = ROTATION_COUNT * STEPS_PER_ROTATION


def setup():
    py5.size(500, 500)
    py5.translate(py5.width / 2, py5.height / 2)
    py5.no_fill()
    py5.stroke_weight(2.5)

    with py5.begin_shape():
        for i in range(0, STEPS):
            # angle of vertex in radians
            angle = np.radians(i % 360)

            # radius of vertex from center
            radius = py5.remap(i, 0, STEPS, INNER_RADIUS, OUTER_RADIUS)

            # x and y coordinates of vertex
            xval = radius * np.cos(angle)
            yval = radius * np.sin(angle)

            # add vertex
            py5.vertex(xval, yval)


py5.run_sketch()
In this example, we create a loop that draws one vertex at a time. For each step, it calculates the angle in radians and the radius of the vertex from the spiral center. Then it uses trigonometry to calculate the x and y coordinates of the vertex.
py5_tools.screenshot()
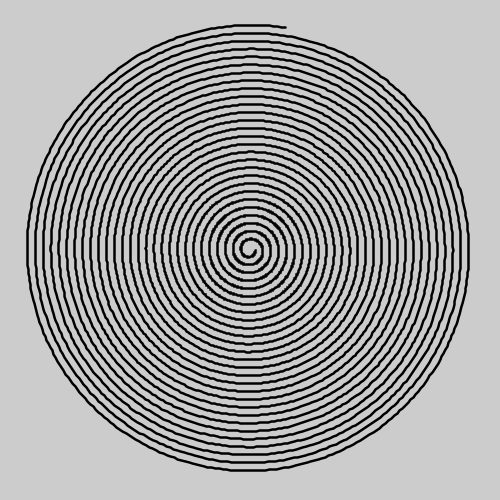
The problem here is that the vertex() method is
called 20 * 500 = 10000 times. That’s a lot, and can cause
performance problems for py5. It’s not that big of a deal here but
this will cause problems if the number of vertices increases even
more.
Let’s look at a different approach that avoids the for loop.
INNER_RADIUS = 5
OUTER_RADIUS = 225
ROTATION_COUNT = 20
STEPS_PER_ROTATION = 500
STEPS = ROTATION_COUNT * STEPS_PER_ROTATION


def setup():
    py5.size(500, 500)
    py5.translate(py5.width / 2, py5.height / 2)
    py5.no_fill()
    py5.stroke_weight(2.5)

    # angles of all of the vertices in radians
    angles = np.radians(np.arange(0, STEPS) % 360)

    # radii of all of the vertices from the center
    radii = np.linspace(INNER_RADIUS, OUTER_RADIUS, STEPS)

    # x and y coordinates of vertices
    xvals = radii * np.cos(angles)
    yvals = radii * np.sin(angles)

    # assemble x and y coordinates into one array
    coordinates = np.stack([xvals, yvals], axis=1)

    with py5.begin_shape():
        py5.vertices(coordinates)


py5.run_sketch()
This code is very similar to before, except that we are using numpy arrays instead of doing calculations on one number a time.
We start by creating numpy arrays angles and radii that contain all
of the vertex angles and all of the vertex radii. We do that with the numpy
methods arange()
and linspace().
Then we proceed much like the first example, calculating the x and y coordinates.
The code looks the same, but because angles and radii are arrays, we are
calculating the coordinates for all of the vertices at the same time.
The last step is to assemble xvals and yvals into one numpy array using numpy’s
stack() method.
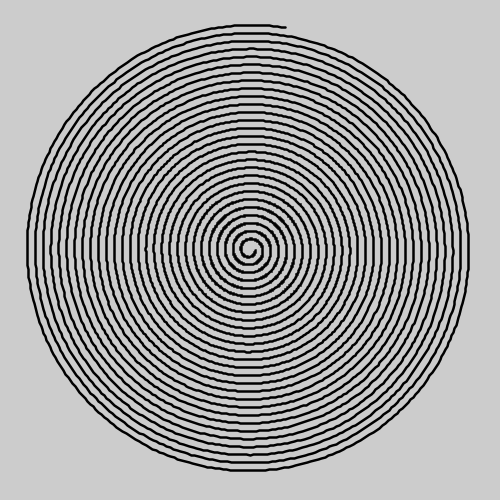
The result is the same but the code is faster and more efficient.
py5_tools.screenshot()
Py5 provides many methods for bulk operations. Here is the complete list:
Also, in Py5Graphics objects:
And finally, Py5Shape objects:
Vectorized Noise#
Py5 uses numpy for its noise functionality. Have a look at How to Generate Pseudorandom Noise for detailed documentation and examples.