three-dimensional graphics in py5#
These tutorials have revolved around the use of two-dimensional graphics in a two-dimensional space. By now, you’ll likely be familiar with the way that coordinates work in py5: 0,0 is the top-left corner of the sketch window, and increasing those numbers can move something along the X axis (left to right) or the Y axis (top to bottom).
The two-dimensional graphics you might draw in this space (like rectangles, circles and complex polyhedrons) are rendered using the built-in py5 renderer. However, this is not the only type of renderer available.
You can actually define the renderer py5 will use in an optional argument when you size your sketch with size(). Although there are quite a few interesting options to choose from (P2D, P3D, FX2D, PDF and SVG), in this tutorial, we’ll be looking at the P3D renderer, which can be used to draw in a three-dimensional space.
The P3D renderer (Processing 3D) is a three-dimensional graphics renderer that makes use of OpenGL-compatible graphics hardware. This means that its ability to render quickly and efficiently will depend on your computer’s graphics card, but it’s a worthy trade-off to have access to three-dimensional shapes (and for most devices, it will still be quite speedy).
Before we draw anything, or even change the renderer to P3D, we need to talk about how we position objects in 3D space. First, we’ll have to look beyond the x, y positioning system, since it only accounts for two dimensions. In a 3D space, we’ll be using x, y, z positioning to place objects. The Z axis is our missing third dimension. A negative Z value will move a 3D object “farther away” from the viewer, and a positive Z value will move it “closer” to the viewer.
It’s important to note that this system is not universal! The way that the Z axis works in py5 is not, for example, the way that it works in the interface OpenGL. py5 is a “left-handed” coordinate system, and OpenGL is “right-handed”. What does this mean? If you use your right hand, then point your index finger along the Y axis (upwards) and your thumb along the X axis, then bend your middle finger, it will be pointing along the Z axis, towards a “positive” value for a right-handed system. For a left-handed system, you can do the same thing with your left hand. The right-hand rule is even depicted on one of the banknotes for the Swiss franc:

Front of the Swiss 200-franc banknote, ninth series (issued in 2018), from Wikimedia Commons
However, we also need to address the expectations you may have on how you can position these objects in 3D space. When drawing a 2D object, like a rect(), you typically pass it arguments to position it, as well as to size it.
rect(x,y,w,h) # X and Y position, then width and height
When we’re drawing a 3D shape, like a box(), you might expect we should give it X, Y and Z positions. However, rendering the positions of objects works a little differently in 3D. The positions of any shape in this 3D space will be adjusted a bit to provide the 3D illusion – so we can’t anticipate that the corners of a box(), for example, will be exactly where we would like it to be. However, the P3D renderer will do its best to position any shape we give it according to any translate() functions we’ve used.
Before we start drawing 3D shapes, we can draw 2D shapes in a 3D space to get used to the concept. The code below shows how a three-dimensional translate() function works. This is how we’ll be positioning our three-dimensional objects, too.
# Creating some global variables for positioning
x = 250
y = 250
z = 0

def setup():
    size(500,500, P3D) # Using the P3D renderer!

def draw():
    global x, y, z # Let's make sure we can adjust those positioning variables
    translate(x,y,z) # We can translate using the Z value, too!
    rect_mode(CENTER) # Drawing our rectangle with the center point aligned to the screen center
    rect(0,0,100,100)

    z += 1 # As Z increases, the rectangle moves closer!

run_sketch()
If you’ve read the other tutorials, you may recall some other transformation functions, aside from translate(), that you can use in a two-dimensional space. rotate(), for example, can spin a shape. In fact, you can use these transformations in a three-dimensional space, too. To get the old rotate() behavior that you’re used to, you’ll want to use rotate_z() with a single value.
x = 250
y = 250
z = 0

def setup():
    size(500,500, P3D)

def draw():
    global x, y, z

    background('#004477') # Adding a background to clear the previous frame

    translate(x,y,z)
    rect_mode(CENTER)

    rotate_z( z / 10 ) # Rotating the shape by a fraction of Z

    rect(0,0,100,100)

    z += 1 # As Z increases, the rectangle spins and moves closer!

run_sketch()

In addition to rotate_z(), we have access to rotate_x() and rotate_y() in this three-dimensional space, too. Experiment with the following snippets to see how they work on 2D shapes.
x = 250
y = 250
z = 0

def setup():
    size(500,500, P3D)

def draw():
    global x, y, z

    background('#004477') # Adding a background to clear the previous frame

    translate(x,y,z)
    rect_mode(CENTER)

    rotate_x( z / 10 ) # Rotating the shape by a fraction of Z

    rect(0,0,100,100)

    z += 1 # As Z increases, the rectangle spins and moves closer!

run_sketch()
x = 250
y = 250
z = 0

def setup():
    size(500,500, P3D)

def draw():
    global x, y, z

    background('#004477') # Adding a background to clear the previous frame

    translate(x,y,z)
    rect_mode(CENTER)

    rotate_y( z / 10 ) # Rotating the shape by a fraction of Z

    rect(0,0,100,100)

    z += 1 # As Z increases, the rectangle spins and moves closer!

run_sketch()
3d primitives in py5#
Let’s swap out our rect() for a three-dimensional primitive shape, box().
The box() function can take a few different arguments. If you only give it a single argument, like box(100), it will be a perfect cube, with an equal height, weight and depth of (in this case) 100 pixels. If you’d like to create an uneven, rectangular box, you can pass it three different arguments for height, weight and depth, like box(100, 70, 50). Remember, we use the translate() function to position three-dimensional objects, so box() doesn’t take any sort of coordinates.
x = 250
y = 250
z = 0

def setup():
    size(500,500, P3D)

def draw():
    global x, y, z

    background('#004477') # Adding a background to clear the previous frame

    translate(x,y,z)

    # You can do multiple rotations at once!
    rotate_y( z / 100 )
    rotate_x( z / 100 )

    box(100) # A box with 100 pixel length on all sides

    z += 1 # As Z increases, the box spins and moves closer!

run_sketch()

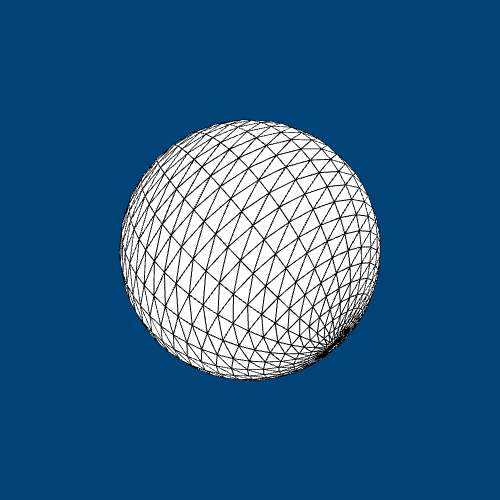
The sphere() function is almost exactly the same – but spheres are always equilateral, so it only takes one argument.
x = 250
y = 250
z = 0

def setup():
    size(500,500, P3D)

def draw():
    global x, y, z

    background('#004477') # Adding a background to clear the previous frame

    translate(x,y,z)

    rotate_y( z / 100 )
    rotate_x( z / 100 )

    sphere(100) # A sphere with 100 pixel length on all sides

    z += 1 # As Z increases, the sphere spins and moves closer!

run_sketch()
custom shapes in 3d#
You might recall that in two dimensions, you can use the begin_shape() and end_shape() functions to draw complex polygons, vertex-by-vertex. This works in 3D, too. You’ll be giving each vertex an X, Y and Z position, so things can get complex quite quickly. Here’s an example of a triangular prism drawn with vertices.
x = 250
y = 250
z = 0

def setup():
    size(500,500, P3D)

def draw():
    global x, y, z

    background('#004477') # Adding a background to clear the previous frame

    translate(x,y,z)

    # a slow rotation based on our frame count
    rotate_x( frame_count / 200 )
    rotate_y( frame_count / 300 )

    begin_shape()
    vertex(-100, -100, -100)
    vertex( 100, -100, -100)
    vertex(   0,    0,  100)

    vertex( 100, -100, -100)
    vertex( 100,  100, -100)
    vertex(   0,    0,  100)

    vertex( 100, 100, -100)
    vertex(-100, 100, -100)
    vertex(   0,   0,  100)

    vertex(-100,  100, -100)
    vertex(-100, -100, -100)
    vertex(   0,    0,  100)
    end_shape()


run_sketch()
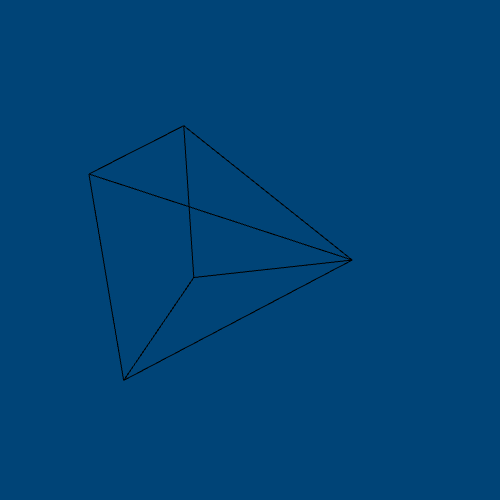
When working in a 3D space like this, it’s much easier to work with some kind of standard unit (in this case, all vertex positions are 0, 100 or -100) and then rotate or reposition the resulting shape using translations and rotations. If you wanted to draw this same prism a little to the left, you wouldn’t want to do all that math yourself!
storing 3d positions#
Since you’re using translate() to position your boxes, spheres and other shapes, accessing their position can sometimes feel a bit tricky. If I wanted to move two shapes, but at very different points in my code, I would likely be using push_matrix() and pop_matrix() to reset or clear out my translate() function. This means that if I moved a box somewhere, moving a rectangle to that same somewhere might require carefully tracking those positioning changes. After all, when a series of rotations and translations has been done, straightforward coordinates like 0,0,0 or 34, 50, 100 are no longer inherently meaningful.
Luckily, a trio of functions makes this a little easier. Using model_x(), model_y() and model_z() can allow us to find the current translated location of any coordinates. In the below code, X, Y and Z are changing each frame, and then being used for our translation function, all wrapped inside of a matrix so that they wouldn’t change the location of any subsequent shapes. However, we can easily find out where 0,0,0 (or any other location) would be in this matrix using model_x(), model_y() and model_z().
x = 250
y = 250
z = 0

def setup():
    size(500,500, P3D)

def draw():
    global x, y, z

    background('#004477')

    # randomize translation values
    x = random(width)
    y = random(height)
    z = random(-500,0)

    # beginning our matrix
    push_matrix()
    translate(x,y,z)

    sphere(100) # A sphere with 100 pixel length on all sides

    # Using model_x, model_y and model_z to see where translate has put our 0 positions
    print("Current X,Y,Z: "
          + str( model_x(0,0,0) ) + ", "
          + str( model_y(0,0,0) ) + ", "
          + str( model_z(0,0,0) )
         )


    # ending our matrix
    pop_matrix()


run_sketch()
Current X,Y,Z: 280.40545654296875, 201.1189422607422, -406.58441162109375
Current X,Y,Z: 108.88874816894531, 487.096435546875, -447.8541259765625
Current X,Y,Z: 65.01591491699219, 55.78096008300781, -212.06591796875
Current X,Y,Z: 212.08425903320312, 250.9650421142578, -381.27783203125
Current X,Y,Z: 30.065948486328125, 68.081298828125, -14.309967041015625
Current X,Y,Z: 300.8692932128906, 108.159423828125, -301.1630859375
Current X,Y,Z: 403.36688232421875, 246.352783203125, -146.22705078125
Current X,Y,Z: 180.03549194335938, 446.0437316894531, -53.45355224609375
Current X,Y,Z: 92.65028381347656, 108.81330871582031, -148.00347900390625
Current X,Y,Z: 276.61083984375, 199.0607147216797, -411.75665283203125
Current X,Y,Z: 294.7973937988281, 387.009033203125, -450.47650146484375
Current X,Y,Z: 19.973617553710938, 100.63018798828125, -305.78924560546875
Current X,Y,Z: 8.455535888671875, 414.076171875, -361.28326416015625
Current X,Y,Z: 296.09613037109375, 246.570068359375, -235.269287109375
Current X,Y,Z: 482.8006591796875, 195.57054138183594, -322.76019287109375
Current X,Y,Z: 171.8037872314453, 491.456298828125, -41.272247314453125
Current X,Y,Z: 438.7236633300781, 113.10295104980469, -148.88134765625
Current X,Y,Z: 418.8297119140625, 13.424850463867188, -97.6622314453125
Current X,Y,Z: 103.572998046875, 388.1005859375, -283.97381591796875
Current X,Y,Z: 229.98291015625, 268.69671630859375, -3.01605224609375
Current X,Y,Z: 38.6214599609375, 480.41326904296875, -100.5225830078125
Current X,Y,Z: 469.2247314453125, 331.0454406738281, -115.755126953125
Current X,Y,Z: 214.82546997070312, 382.0293884277344, -458.0557861328125
Current X,Y,Z: 187.5670623779297, 229.15179443359375, -18.021148681640625
Current X,Y,Z: 86.64541625976562, 388.63372802734375, -44.2728271484375
Current X,Y,Z: 96.32632446289062, 67.08731079101562, -402.0855712890625
Current X,Y,Z: 445.263916015625, 319.5559997558594, -122.25189208984375
Current X,Y,Z: 325.0059814453125, 59.05047607421875, -255.03900146484375
Current X,Y,Z: 246.65480041503906, 437.9455871582031, -461.005126953125
Current X,Y,Z: 421.2489013671875, 211.1492462158203, -334.2384033203125
Current X,Y,Z: 440.1518249511719, 273.2106018066406, -116.3341064453125
Current X,Y,Z: 385.80224609375, 491.48858642578125, -398.1011962890625
Current X,Y,Z: 436.142578125, 457.53594970703125, -403.819091796875
Current X,Y,Z: 88.23464965820312, 221.1554412841797, -332.3177490234375
Current X,Y,Z: 459.44891357421875, 214.94102478027344, -207.91400146484375
Current X,Y,Z: 329.47607421875, 197.49159240722656, -24.437408447265625
Current X,Y,Z: 7.625732421875, 417.93743896484375, -372.478271484375
Current X,Y,Z: 122.1843032836914, 43.72560119628906, -85.82489013671875
Current X,Y,Z: 82.5130615234375, 285.2998046875, -454.59173583984375
Current X,Y,Z: 160.49530029296875, 409.92730712890625, -159.0831298828125
Current X,Y,Z: 11.954254150390625, 129.4025421142578, -203.81829833984375
Current X,Y,Z: 12.068603515625, 14.370513916015625, -224.9517822265625
Current X,Y,Z: 40.746551513671875, 39.31379699707031, -298.4073486328125
Current X,Y,Z: 347.0696716308594, 231.3652801513672, -348.6802978515625
Current X,Y,Z: 10.715972900390625, 277.7069396972656, -496.1859130859375
Current X,Y,Z: 215.110595703125, 88.62283325195312, -80.5555419921875
Current X,Y,Z: 439.5611572265625, 213.7659454345703, -318.3330078125
Current X,Y,Z: 195.42233276367188, 478.1516418457031, -498.0872802734375
Current X,Y,Z: 369.502685546875, 423.2588806152344, -459.720458984375
Current X,Y,Z: 190.0216522216797, 100.76486206054688, -362.1455078125
Current X,Y,Z: 456.1311950683594, 183.5815887451172, -192.695556640625
Current X,Y,Z: 324.2067565917969, 293.97247314453125, -1.143768310546875
Current X,Y,Z: 284.9895324707031, 352.30078125, -344.27520751953125
Current X,Y,Z: 166.18336486816406, 369.01434326171875, -122.9757080078125
Current X,Y,Z: 349.3416442871094, 415.8080749511719, -83.54937744140625
Current X,Y,Z: 403.67120361328125, 103.44873046875, -249.226806640625
Current X,Y,Z: 465.1369323730469, 488.3211975097656, -43.18463134765625
Current X,Y,Z: 86.1824951171875, 353.65362548828125, -252.112548828125
Current X,Y,Z: 402.14599609375, 282.5486755371094, -68.45944213867188
Current X,Y,Z: 359.62835693359375, 190.79275512695312, -78.69586181640625
Current X,Y,Z: 244.5317840576172, 261.1521301269531, -483.38482666015625
Current X,Y,Z: 245.70579528808594, 92.13092041015625, -165.5750732421875
Current X,Y,Z: 310.8514099121094, 39.38868713378906, -1.14654541015625
Current X,Y,Z: 216.7130126953125, 324.3185729980469, -400.8026123046875
Current X,Y,Z: 120.10336303710938, 88.28903198242188, -258.897705078125
Current X,Y,Z: 11.124359130859375, 316.88385009765625, -399.2528076171875
Current X,Y,Z: 292.1060485839844, 186.28443908691406, -269.6229248046875
Current X,Y,Z: 483.3688659667969, 248.74575805664062, -85.71124267578125
Current X,Y,Z: 458.7672424316406, 5.1237335205078125, -249.822509765625
Current X,Y,Z: 91.46940612792969, 216.32562255859375, -112.328125
Current X,Y,Z: 56.5643310546875, 196.593505859375, -334.23333740234375
Current X,Y,Z: 87.69932556152344, 475.2991027832031, -410.44793701171875
Current X,Y,Z: 206.6707763671875, 352.64044189453125, -459.69342041015625
Current X,Y,Z: 226.52407836914062, 472.4335021972656, -332.1981201171875
Current X,Y,Z: 212.07679748535156, 244.64178466796875, -441.98345947265625
Current X,Y,Z: 471.619384765625, 115.79824829101562, -129.41558837890625
Current X,Y,Z: 368.6619567871094, 259.37188720703125, -38.2745361328125
Current X,Y,Z: 86.19612121582031, 367.7141418457031, -288.12890625
Current X,Y,Z: 497.9886779785156, 172.16432189941406, -131.217041015625
Current X,Y,Z: 262.23883056640625, 180.57186889648438, -65.42935180664062
Current X,Y,Z: 308.30474853515625, 141.84640502929688, -63.272430419921875
Current X,Y,Z: 27.089111328125, 69.18658447265625, -119.21783447265625
Current X,Y,Z: 75.99424743652344, 498.7619323730469, -310.0816650390625
Current X,Y,Z: 92.90673828125, 473.57135009765625, -430.2296142578125
Current X,Y,Z: 56.22821044921875, 480.06011962890625, -290.0211181640625
Current X,Y,Z: 88.39459228515625, 435.8919677734375, -143.55035400390625
Current X,Y,Z: 141.3998260498047, 185.93609619140625, -352.3521728515625
Current X,Y,Z: 223.3719024658203, 47.7586669921875, -263.4366455078125
Current X,Y,Z: 445.9453125, 376.2007141113281, -360.971923828125
texturing 3D objects#
Using the texture() function inside of a custom shape, before you start drawing vertices, you can apply an image to the surface of a shape. In addition to loading the image (with load_image()) and applying it (with texture()), you’ll have to pass some extra arguments to each vertex. By default, these extra arguments relate to the full dimensions of the image in pixels. You can use texture_mode(NORMAL) to switch to a mode where these arguments are “normalized” to a range from 0 to 1, or texture_mode(DEFAULT) to switch back.
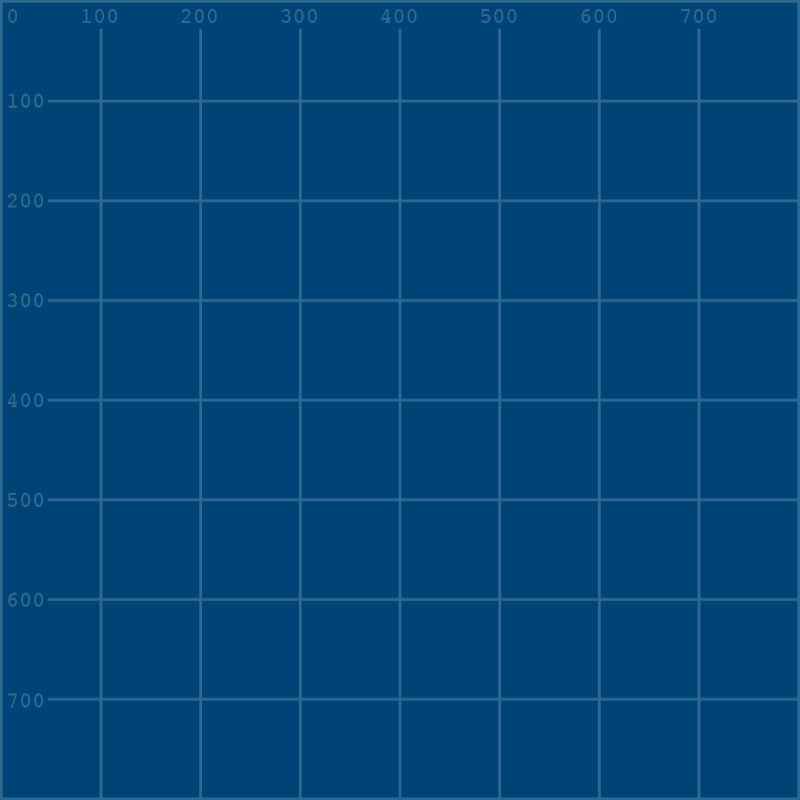
Wrapping an image around 3D shapes is no trivial task. The example below uses a simple 2D triangle, though in a 3D space. I’ve elected to use the grid.png image from previous tutorials here, but you could use any image of a sufficient size.
x = 250
y = 250
z = 0

img = None

def setup():
    size(500,500, P3D)
    global img
    img = load_image("images/3d/grid.png")

def draw():
    global x, y, z

    background('#000000')

    translate(x,y,z)

    # a slow rotation based on our frame count
    rotate_x( frame_count / 200 )
    rotate_y( frame_count / 300 )

    begin_shape()
    texture(img)
    vertex(-100, -100, -100, 0, 0)
    vertex(100, -100, -100, 300, 120)
    vertex(0, 0, 100, 200, 400)
    end_shape()


run_sketch()

importing 3d models into py5#
In addition to the (admittedly tedious) method of building 3D shapes using vertices, you can actually load 3D models into py5 with the load_shape() function! This function can take file formats of .svg or .obj, with the latter being used for 3D models. For the purposes of this demo, we’re using Suzanne, the unofficial mascot of the 3D modeling program Blender. You can download suzanne.obj yourself and put her in the same folder as your sketch, or use any other 3D model in the right format.
First, we load our .obj in the setup() block. You can use load_shape() (or load_image(), for that matter) inside of draw(), but it’s slow and expensive in terms of processing power, so it’s much better to load things into a variable ahead of time and just use them when needed.
Inside of draw(), we use shape() with our new variable (and a position of 0,0) to actually display Suzanne. In addition to applying a translate() and a few rotations, we’re using scale() to scale the model up – the default scale provided by Blender is really small!
x = 250
y = 250
z = 0

suzanne = None

def setup():
    size(500,500, P3D)
    global suzanne
    suzanne = load_shape("images/3d/suzanne.obj")

def draw():
    global x, y, z

    background('#004477')

    translate(x,y,z)

    # a slow rotation based on our frame count
    rotate_x( frame_count / 200 )
    rotate_y( frame_count / 300 )

    scale(100)
    shape(suzanne,0,0)


run_sketch()

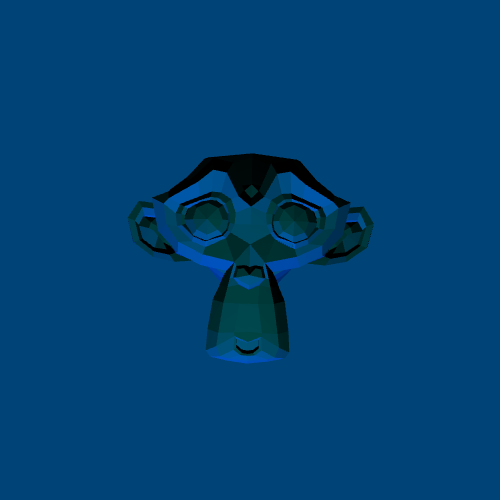
Compared to other ways you may have viewed 3D models before, Suzanne is looking pretty flat without any textures or materials. The details are difficult to make out because there’s currently no lighting in our sketch – but we can fix that.
3d lighting simulation in py5#
When using the P3D or P2D renderers, py5 gives you access to a few different types of lighting. The simplest way to use this is with the lights() function, which sets up some default lighting for subsequently loaded objects. In the example below, holding the mouse button down will run lights() and add some real definition to Suzanne’s face.
x = 250
y = 250
z = 0

suzanne = None

def setup():
    size(500,500, P3D)
    global suzanne
    suzanne = load_shape("images/3d/suzanne.obj")

def draw():
    global x, y, z

    background('#004477')

    translate(x,y,z)
    rotate_z(9.45) # Putting Suzanne's head upright

    scale(100)

    if (is_mouse_pressed):
        lights()

    shape(suzanne,0,0)


run_sketch()

Using lights() is a quick way of using a few different lighting functions made available in py5: ambient_light(), directional_light(), light_falloff() and light_specular(). You can adjust these qualities manually and also create another type of lighting, point_light().
The functions ambient_light(), directional_light() and point_light() all create new lighting sources, but with slightly different properties.
ambient_light() has no particular direction, and spreads throughout the space. It takes three arguments for the color of the light (R, G and B values) and two or three arguments for its position in the sketch (X, Y and Z coordinates).
directional_light() is aimed in a direction, and will be stronger on some surfaces depending on the angle at which it hits them. It takes three arguments for the color of the light (R, G and B values) and two or three arguments for its direction (along the X, Y and Z axis).
point_light() is a positioned light that does not light the space equally – a happy medium between an ambient and a directional light, good for lighting specific areas. It takes three arguments for the color of the light (R, G and B values) and two or three arguments for its position in the sketch (X, Y and Z coordinates).
Meanwhile, light_falloff() and light_specular() adjust the properties of any subsequent lighting in the sketch to give you more fine-tuned control.
It can be difficult to understand light_falloff() without further studying digital lighting, but experimenting with the three arguments it takes (constant, linear and quadratic values) can yield interesting results.
The light_specular() function adjusts the specular color of the lights, which refers to the color of the highlight or “shine” on lit objects. It takes three arguments for R, G and B values.
The below sketch sets the specular values to a teal color, and when the mouse is pressed, produces a dark blue point light at the current mouse position. Try holding the mouse down and dragging it around your sketch to watch how the location of the point light changes the shadows and highlights.
x = 250
y = 250
z = 0

suzanne = None

def setup():
    size(500,500, P3D)
    global suzanne
    suzanne = load_shape("images/3d/suzanne.obj")

def draw():
    global x, y, z

    background('#004477')

    translate(x,y,z)
    rotate_z(9.45) # Putting Suzanne's head upright

    scale(100)

    if (is_mouse_pressed):
        light_specular(0,180,180) # Teal highlights/shine
        point_light(0,0,255,mouse_x,mouse_y,0) # A dark blue point light


    shape(suzanne,0,0)


run_sketch()
In addition to adjusting the properties of the lights, you can adjust the properties of the objects in the scene and how they react to light. specular() works similarly to light_specular(), but for the models themselves instead of the lights. shininess() takes a single value from 0 to 255 to determine the glossiness or shininess of objects. You can also adjust ambient reflective color values with ambient() and emissive color values with emissive().
There’s a lot more experimentation you could do with lighting in py5, but that’s enough for a quick taste. Let’s move on to adjusting our view of the 3D environment.
camera adjustment in py5#
Using camera(), you can set a few different values. The first three (which refer to an X, Y and Z position, of course) are the position of the camera itself. The next three coordinates refer to the center of the screen, towards which the camera is pointing. Finally, you can define custom “up” directions for the X, Y and Z axis in your scene. Below, we use camera() with the mouse position to pan around Suzanne’s front and sides, while always pointing directly at her.
x = 250
y = 250
z = 0

suzanne = None

def setup():
    size(500,500, P3D)
    global suzanne
    suzanne = load_shape("images/3d/suzanne.obj")


def draw():
    global x, y, z

    background('#004477')


    camera(mouse_x, mouse_y, width/2.0, # Adjusting the camera based on mouse position
           x, y, z, # ... but always pointing towards Suzanne
           0, 1, 0)

    translate(x,y,z)
    rotate_z(9.45) # Putting Suzanne's head upright

    scale(100)

    if (is_mouse_pressed):
        light_specular(0,180,180) # Teal highlights/shine
        point_light(0,0,255,mouse_x,mouse_y,0) # A dark blue point light


    shape(suzanne,0,0)


run_sketch()
Of course, this is a simple way of experimenting with camera positioning. If you wanted to create a scene where the camera could be moved with the arrow keys, it might be a little more complex, but you’d also have much greater control over these values.
where next?#
One potential area worth exploring is the world of shaders. If you happen to have any lying around, you can load shader files (probably in a .GLSL format) into py5 using the shader() function with a filename. Shaders are complex and fascinating, and completely beyond the scope of this tutorial.
However, it’s worth checking out The Book of Shaders for an introduction to this world, and parts of the book which apply to Processing are broadly applicable to what we’ve done here in py5.
Have fun!