Py5Graphics.begin_camera()#
The begin_camera() and Py5Graphics.end_camera() functions enable advanced customization of the camera space.
Examples#

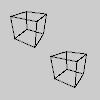
def setup():
    py5.size(100, 100, py5.P2D)

    g = py5.create_graphics(60, 60, py5.P3D)

    with g.begin_draw():
        g.no_fill()
        with g.begin_camera():
            g.camera()
            g.rotate_x(-py5.PI/6)
        g.translate(30, 30, 0)
        g.rotate_y(py5.PI/3)
        g.box(30)

    py5.image(g, 0, 0)
    py5.image(g, 40, 40)
Description#
The begin_camera() and Py5Graphics.end_camera() functions enable advanced customization of the camera space. The functions are useful if you want to more control over camera movement, however for most users, the Py5Graphics.camera() function will be sufficient. The camera functions will replace any transformations (such as Py5Graphics.rotate() or Py5Graphics.translate()) that occur before them, but they will not automatically replace the camera transform itself. For this reason, camera functions should be placed right after the call to Py5Graphics.begin_draw() (so that transformations happen afterwards), and the Py5Graphics.camera() function can be used after begin_camera() if you want to reset the camera before applying transformations.
This function sets the matrix mode to the camera matrix so calls such as Py5Graphics.translate(), Py5Graphics.rotate(), Py5Graphics.apply_matrix() and Py5Graphics.reset_matrix() affect the camera. begin_camera() should always be used with a following Py5Graphics.end_camera() and pairs of begin_camera() and Py5Graphics.end_camera() cannot be nested.
This method can be used as a context manager to ensure that Py5Graphics.end_camera() always gets called, as shown in the example.
This method is the same as begin_camera() but linked to a Py5Graphics object. To see example code for how it can be used, see begin_camera().
Underlying Processing method: PGraphics.beginCamera
Signatures#
begin_camera() -> None
Updated on March 06, 2023 02:49:26am UTC
